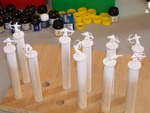
July 24, 2008Into the mini painting black holeby Ed RozmiarekWe have playing a lot a Descent lately, three sessions in the last couple of months, one normal Descent game and the first two sessions of our Road to Legend campaign. But those three sessions total about 15 or 16 hours of game play. Spurred on by all this playing and the desire to do a non computer related project, I decided to dig out my paints and paint the Descent miniatures. This is not a small undertaking. The base Descent game comes with 80 minis (60 monsters and 20 unique heroes). The two expansions add in another 60 monsters and 12 more heroes. So that's 120 monsters (20 different types) and 32 unique hero figures. And that's not counting the 25 or so new figures that will be coming with the Tomb of Ice expansion in (hopefully) a couple months. So, I figure I have started a 9 to 12 month project given my normal free time availability and if I can stick with it. So, a couple weeks ago I dug out my mini paints and went through them to see which ones had dried out. Luckily, I only had to toss 4 or 5 of them. These were replaced and a few new colors were picked up at our FLGS. I figured that painting the monsters in groups by type would be the most efficient. So I decided to start with the skeletons since they seem to get a lot of use and would see a lot of board time. These guys had a lot more detail on them than I first noticed. They may not have been the easiest to start with, but they were fun to work on. The Descent figures come in two colors, red for "master" monsters and off white for regular ones. After looking at several samples online, I decided to keep the red motif for the masters via the clothing and/or markings. Since the skeletons have some uniform like clothing, the masters' clothing would be red and the regulars would be a mix of colors. Also, they tend to get spawned in groups of one master and two regulars, so I painted two of each color so I could have "squads". For finishing the skeletons, I wanted to try "washing" them with the "magic dip" I had read about on a few web sites. What is the "magic dip"? It's Minwax Polyshades stain in a Tudor color. This is a very dark, nearly black, stain mixed with polyurethane. Basically you dip the painted mini in the stain, remove the excess and let it dry. The stain will settle into the groves and low spots and bring out the details. The polyurethane also gives the mini a protective shell. It was a little scary at first as my newly painted figures came out covered in really black stain. But, shaking off the excess and using a brush to even out the drips, they emerged with nice detail. As they dried and the stain settled in the cracks, the figures looked more realistic. After the stain dried (about a day in a hot Texas garage), I gave the figures a shot of matte finish to dull the shine of the polyurethane. Add a little drying time and the skeletons were done. Now, on to the beastmen. (You can find more pictures in the photo gallery.) Posted by Ed Rozmiarek at July 24, 2008 3:19 PMComments
Post a comment
This page viewed E-mail Ed Rozmiarek with questions or problems concerning this page. Copyright © 2008, Ed & Susan Rozmiarek. |


